[Updated 2019-03-17] Are you wondering why some JavaScript code from external domains simply won’t execute on your website? The reason could be as simple as an overly restrictive Content Security Policy (CSP for short). This article explains how you can create a Content Security Policy that’s both protective and functional. It will help you to secure your web server from some types of cross-site request forgery (XSRF/CSRF/XFS), clickjacking and other code injection attacks.
Who needs a Content Security Policy
Have you seen malicious activity in your web server logs or in your analytics suite? Don’t panic. By using a Content Security Policy, you can defend your infrastructure against cross-site request scripting and cross-site request forgery.
A Content Security Policy (CSP) is a set of directives for the web server can block any content sources except for those you specifically approve (such as your own CDN or your advertising networks). This can considerably limit the exposure of your web applications to content injection and request forgery attacks. With a CSP in place, you take away one major incentive for your users to deactivate JavaScript and give them one more reason to trust your web application.
If your website is using JavaScript—either externalized or inline—you do need a Content Security Policy.
You as the web administrator, along with your web developers, are responsible for ensuring the safety of visitors who trust the code you deploy. A correctly configured Content Security Policy goes a long way towards that end by telling the browser which scripts you explicitly authorize to run on your domain.
How do you know if your website has a Content Security Policy in place? One way to quickly verify if security headers are set it is by using the free service https://securityheaders.io/. This service will list any directives you have in place, but it can’t judge if your Content Security Policy headers make sense. You have to make that decision yourself.
How a Content Security Policy protects your web application
A Content Security Policy defines a set of trusted domains. It says that you want your visitors’ web browsers to trust them when executing JavaScript (and usually, distrust anything else).
The HTTP Content Security Policy header
A web browser reads the Content Security Policy from the HTTP Content Security Policy header that your web server sends alongside your website content. As of this writing, all reasonably current web browsers support this feature. A web browser which supports this feature will block the execution of JavaScript from all sources you do not approve of, thus rendering cross-site request forgery (XSRF/CSRF/XFS) attempts totally ineffective (the mechanics of cross-site request forgery are detailed in this OWASP document).
For example, you may want to embed JavaScript from a web analytics service (such as Google Analytics), a social media widget (Facebook, Twitter, etc.), or an advertising network and disable the execution of code from all other domains, which you haven’t explicitly approved. All you need to do is whitelist the domains you consider trustworthy in the HTTP Content Security Policy header.
The limitations of CSP
A Content Security Policy is a whitelist of origin domains of scripts that you consider trustworthy. It is not a firewall. With some additional effort, an attacker might be able to circumvent your CSP. For example like this (see this GitHubGist and also this post by David Gilbertson):
How to work around inline script injection
A CSP cannot defend your web application from inline script injection. With inline script injection, the malicious payload is being served from a trusted domain and so the browser will accept it as legitimate. In order to safeguard your visitors from inline script injection, there are a few important actions you need to take (see steps 3 and 4 below).
Understanding the two modes of operation: permissive versus enforcing
CSP has two modes of operation designed for debugging and deployment:
- Content-Security-Policy-Report-Only: this is the permissive mode; it is not enforcing the current policy but it is reporting violations;
- Content-Security-Policy: this is the enforcing mode; your web server is directing each visitor’s web browser to enforce the policy (the browser will comply providing that it supports the feature and understands the request).
Activate the -Report-Only mode
It goes without saying that you don’t have to wreck your website to figure out the policy settings. Begin in the permissive mode. Configure your policy, keeping an eye on errors in the Console of Developer Tools panel of your browser. Make sure that you have ironed out all the kinks before you begin enforcing your policy. A half-baked configuration may cause not scripts, images and CSS stylesheets to fail to load correctly.
Only after all errors are gone you will want to switch to the enforcing mode.
Step 1. Activate the permissive mode
To activate the permissive mode, open your web server’s configuration file which defines its behavior for your website in a text editor of your choice. NGINX configuration files are typically located in /etc/nginx/ or its subdirectory sites-enabled.
Enter the following directive on a separate line:
Content-Security-Policy-Report-Only
In the permissive mode, reporting is mandatory. If you were to reload the configuration of NGINX and access the website in a web browser, you would see this error in the Console of Developer Tools:
The Content Security Policy [...] was delivered in report-only mode, but does not specify a 'report-uri'; the policy will have no effect. Please either add a 'report-uri' directive, or deliver the policy via the 'Content-Security-Policy' header.
Luckily, you can easily fix this nagging and be in compliance without writing a line of code thanks to the service https://report-uri.io/.
Step 2. Obtain an report-uri endpoint for use with the directive Content-Security-Policy-Report-Only
Here is how to do it in more detail: How to set up Report URI to prevent code injection attacks.
Step 3. Activate reporting to your new endpoint
In order to activate reporting to your new endpoint in the permissive mode, add this directive to the NGINX server block for your web application:
add_header Content-Security-Policy-Report-Only "report-uri https://addressofyourendpoint.report-uri.com/r/d/csp/reportOnly";
Save the web server configuration file and reload NGINX:
systemctl reload nginx
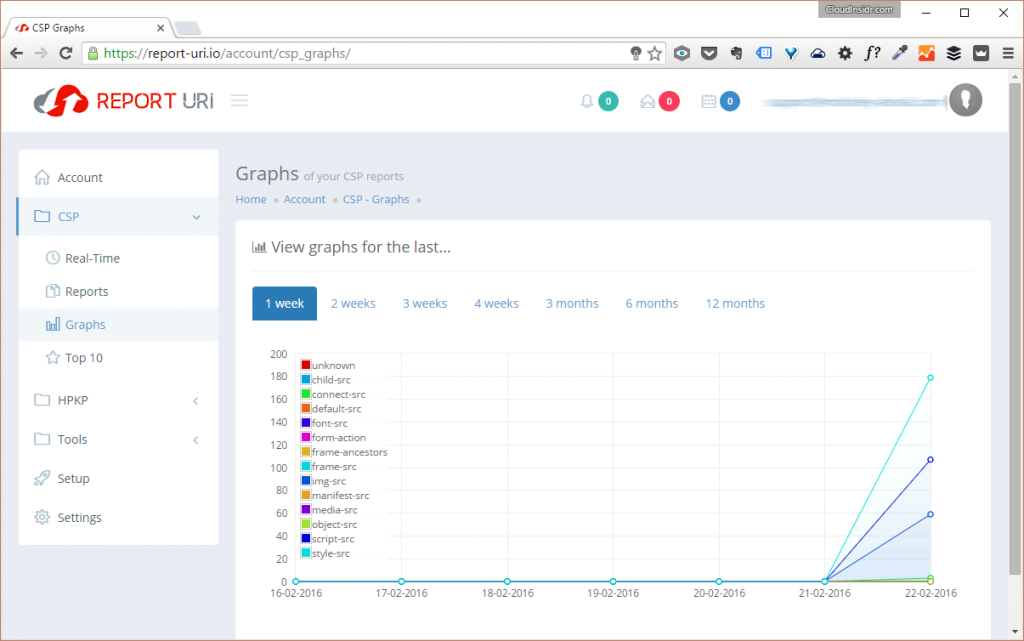
The browser should finally quit nagging you about the missing report-uri and the service report-uri.com can begin collecting valuable analytics data relevant to the security of your web applications. You can view the results in the section CSP under the subheadings Reports and Graphs.
Right now, your Content Security Policy is empty and not doing anything. It’s time to whitelist approved content sources.
How to whitelist approved content sources
Code injection attacks can be prevented by using the directive script-src. This directive whitelists the content sources that you explicitly approve of. Now the real question is: how do you figure out what to approve of?
Start by setting up the fallback. You are still working in the permissive mode. Changes will take effect immediately, but merely reflect in the reports; they won’t break your site (unless you break the syntax).
Step 1. Define the fallback
Define your fallback (important! this is a one-liner):
add_header Content-Security-Policy-Report-Only "default-src 'self';
report-uri https://report-uri.io/report/addressofyourendpoint/reportOnly";
You can also be more verbatim by replacing ‘self’ in the default-src directive with yourdomainname.tld or even better, include the port number:
https://www.yourdomainname.tld:443
In order for a resource to be loaded, you have to specify it with a directive appropriate for its content type.
Step 2. Trust yourself with content sources for the protected ressource
Trust your server with all relevant types of content by using appropriate directives in this one-liner:
add_header Content-Security-Policy-Report-Only "default-src 'self';
script-src 'self';
img-src 'self';
style-src 'self';
font-src 'self';
form-action 'self';
object-src 'self'
connect-src 'self'";
(The directive obj-src defines the approved location of plug-ins the protected resource may need to load.)
Policy options that are at your disposal include:
- ‘none’ blocks the use of specified resource,
- ‘self’ matches the current origin, but not subdomains,
- ‘unsafe-inline’ allows the use of inline JS and CSS,
- ‘unsafe-eval’ allows the use of mechanisms like eval().
Don’t add a directive twice, as the second instance of a directive will be ignored. Separate additional values of a directive by spaces and end the directive with a semicolon (The semicolon after the closing double quotation mark belongs to NGINX).
Step 3. Decide what to do about inline JavaScript code to prevent script injection attacks
Now that you have approved your own website, browsers will trust all inline scripts and execute them with reckless abandon. If you don’t have inline scripts, skip to step 4.
The only way you can safeguard your visitors from inline script injection attacks using CSP requires you to to ban inline scripts as a matter of principle. This means that you have to make a few adjustments to the code and markup of your web application:
- externalize inline scripts by placing the code contained in script tags in separate files (for example using Adobe Dreamweaver CC)
- replace inline event handlers such as <a (…) onclick=”[JAVASCRIPT]”> and javascript: URLs with addEventListener calls.
Whitelisting individual scripts
It worth noting that CSP Level 2 allows you to whitelist individual inline scripts by identifying them with a cryptographic nonce (a randomly generated number used once and impossible to guess) or a hash. This is how it looks in the markup:
<script nonce=analphanumericstringrandomlyregeneratedforeveryrequest>
 // Some inline code I can't remove yet, but need to asap.
</script>
And this is how to declare the above script as legit in the script-src directive:
Content-Security-Policy: script-src 'nonce-analphanumericstringrandomlyregeneratedforeveryrequest'
Implementing ‘nonce-…’ is a lot of (rather senseless) work. Unless you are running a site with in an extremely security sensitive context, you may want to use hashes instead.
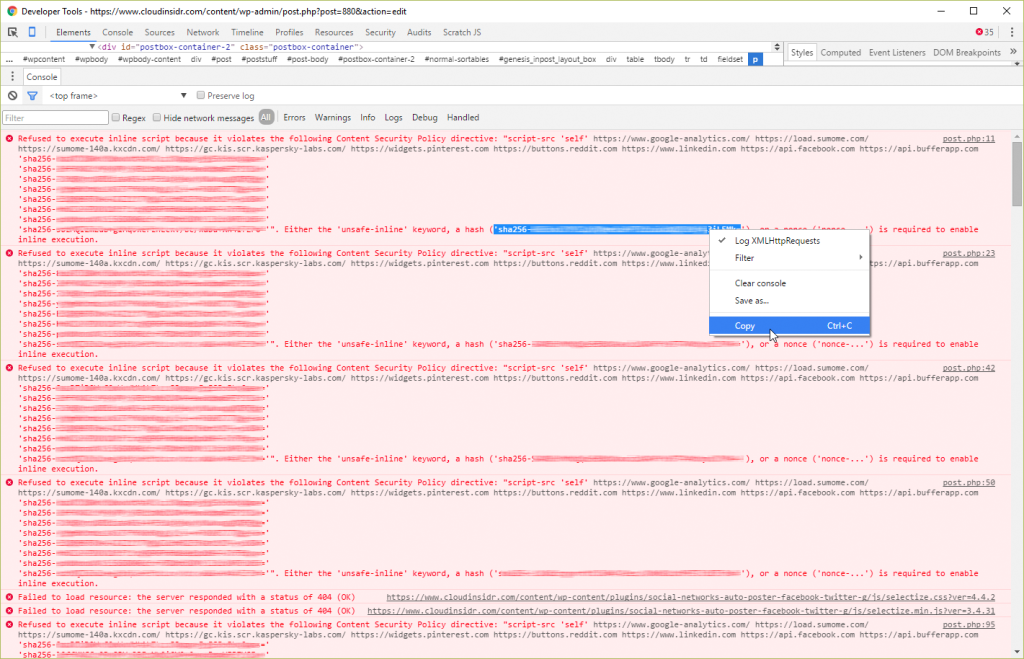
Navigate to your website in a web browser of your choice and open its Developer Tools panel (right-click on the page, select the Inspect command, then switch to the appropriate view, which is usually Network, and turn your attention to the Console). Make sure your web server has reloaded your most recent configuration file, then reload the page. Look at the output in the browser’s Console. Copy the hash value provided by your web browser to your clipboard (including ”) and add it into the script-src directive.

Using hashes may not be a good idea for inline styles which you don’t control, however. If your styles are provided by plug-ins, this job would never end and may impede your ability to add content or functionality to the site, because of the sheer amount of work involved in verifying and “approving” inline styles for execution. Use the ‘unsafe-inline’ directive instead of the hashes, and move on.
WARNING: The parameter ‘unsafe-inline’ is ignored if either a hash or nonce value is present in the source list for the directive.
Inline CSS (cascading stylesheets) pose a similar challenge, but luckily a far lesser risk—approve them as described in step 4, and move on.
Step 4. Approve inline CSS
In order to approve inline CSS, if you were sufficiently paranoid, you would either add a hash for each snippet you wished to execute to the style-src directive, or use a ‘nonce-…’ evaluation to allow execution (the latter one requires changes to the code). In most cases, this is an overkill and may not be doable if your CMS plugins generate new inline snippets (for example in comments). The easiest way to approve all inline CSS involves adding ‘unsafe-inline’ to your style-src directive (are you feeling paranoid yet?) like in this one-liner:
add_header Content-Security-Policy-Report-Only "default-src 'self';
script-src 'self';
img-src 'self';
style-src 'self' 'unsafe-inline';
font-src 'self';
form-action 'self';
object-src 'self'";
Now all inline CSS originating from your server will be executed.
Step 5. Allow fonts and images with data: URLs
Allow fonts and images with data: URLs by appending data: to the img-src and font-src directives:
img-src 'self' data:;
font-src 'self' data:;
Step 6. Allow trusted cross-domain AJAX requests and begin testing
Next, you need to trust scripts provided by your analytics services, your advertisers, and the like (if you don’t feel like trusting external content sources, what’s the point of loading these files?).
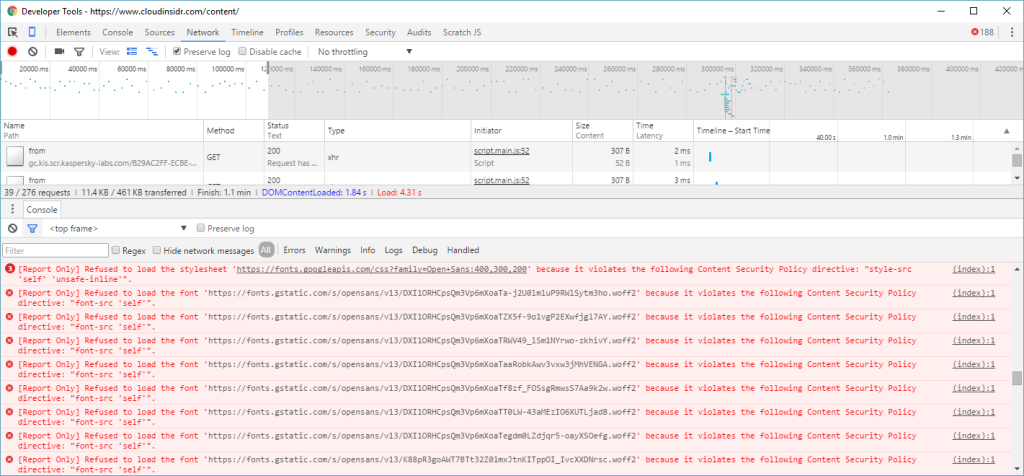
Navigate to your website in a web browser of your choice and open its Developer Tools panel (right-click on the page, select the Inspect command, then switch to the appropriate view, which is usually Network, and turn your attention to the Console).
Make sure your web server has reloaded your most recent configuration file, then reload the page. Look at the output in the browser’s Console.

Now comes the heavy lifting: manually evaluating content sources and adding them to the policy is no fun.
For example, the browser may say:
Uncaught EvalError: Refused to evaluate a string as JavaScript because 'unsafe-eval' is not an allowed source of script in the following Content Security Policy directive: [...].
Solution: add ‘unsafe-eval’ to the Content Security Policy directive script-src.
The browser may complain:
[Report Only] Refused to execute inline script [...] Either the 'unsafe-inline' keyword, a hash ('sha256-17oBQkrpUDBidsaV61+43f1oWjeWxyMuKwnugVDQFQg='), or a nonce ('nonce-...') is required to enable inline execution.
That only means you have overlooked an inline script in Step 3 above.
WARNING: It bears repeating that the parameter ‘unsafe-inline’ will be ignored if either a hash or nonce value is present in the source list for the directive.
Repeat this procedure for each web application and its admin front-end to ensure that it is working as desired. (When in doubt, refer to the Content Security Policy Quick Reference Guide)
Step 7. Switch to the enforcing mode
Once all errors are fixed, switch to the enforcing mode. Below is an example policy. (Please remember: this is a one-liner; you must remove all end-of-line characters before restarting NGINX).
[sociallocker]add_header Content-Security-Policy "default-src 'none';
script-src 'self' 'unsafe-inline' 'unsafe-eval'
https://www.google-analytics.com/
https://load.sumome.com/
https://sumome-140a.kxcdn.com/
https://gc.kis.scr.kaspersky-labs.com/
https://widgets.pinterest.com
https://buttons.reddit.com
https://www.linkedin.com
https://api.facebook.com
https://api.bufferapp.com;
img-src 'self' data:
https://sumome-140a.kxcdn.com
https://dashboard.zopim.com
https://affiliate.thesslstore.com
https://ws-na.amazon-adsystem.com
https://ir-na.amazon-adsystem.com
https://images-na.ssl-images-amazon.com
https://www.google-analytics.com
https://stats.g.doubleclick.net
https://secure.gravatar.com;
style-src 'self' 'unsafe-inline'
https://fonts.googleapis.com
https://sumome-140a.kxcdn.com/;
font-src 'self' data:
https://fonts.gstatic.com/;
form-action 'self';
connect-src 'self'
https://apis.google.com https://sumome.com/ https://clients6.google.com https://sumome-140a.kxcdn.com/;
object-src 'self';
report-uri https://report-uri.io/report/yourreportingendpointwhenenforcing";[/sociallocker]
Step 8. Confirm that your setup is correct and complete
You can test your policy using these services:
https://report-uri.io/home/analyse
Also, visit your analytics dashboard to investigate policy violations.

Speaking of CSP, these are the settings used by Twitter (it’s a one-liner); they may inspire you to simplify your setup:
default-src https:;

connect-src https:;

font-src https: data:;

frame-src https: twitter:;

frame-ancestors https:;

img-src https: data:;

media-src https:;

object-src https:;

script-src 'unsafe-inline' 'unsafe-eval' https:;

style-src 'unsafe-inline' https:;

report-uri https://twitter.com/i/csp_report?a=NVQWGYLXFVZXO2LGOQ%3D%3D%3D%3D%3D%3D&ro=false;
One last thing: make sure you back up your web server’s configuration file.

Leave a Reply